Using BlueStacks 5 for Android Penetration Testing
BlueStacks is an Android emulator primarily aimed at gamers, but it can be a very useful platform for penetration testers too. While tools like Genymotion and Android Studio are more widely known in the security field, I’ve personally found BlueStacks to be the least problematic platform when testing Android applications.
BlueStacks is relatively quick to download, install, and boot up. It comes with the Play Store preinstalled, and sideloading third-party APKs often involves a double click from the host platform! One of the nice features is how easy it is to root the device and install custom certificates, which makes it especially useful for security testing.
Rooting
BlueStacks 5.x includes the option to enable or disable root access through a simple configuration file. You’ll find the file at:
C:\ProgramData\BlueStacks_nxt\bluestacks.conf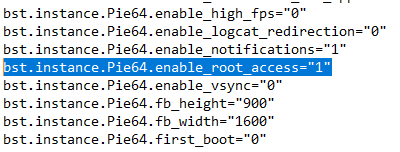
Inside the file, modify the relevant lines to toggle root access.
Installing Burp/ZAP Certificates
Once rooted, it’s a good idea to install tools like Root Certificate Manager and a system proxy application such as ProxyDroid, both of which are available from the Play Store. What we'll want to do now is install our proxy root certificate. In order to do this you’ll need to be able to write to the root disk, which is not possible by default.
Pie64.bstk Changes
To make full use of rooting and allow read/write access to the root filesystem, the disk type for the root image in the file C:\ProgramData\BlueStacks_nxt\Engine>notepad Pie64\Pie64.bstk must be changed to "Normal". Before doing this, make sure all BlueStacks processes are completely shut down, otherwise your changes will likely be overwritten.
Here’s the relevant section to update:

Once the file system changes have been modified accordingly, you can then install the Burp certificate via Root Certificate Manager. You simply copy the certificate across and point RCM at it:
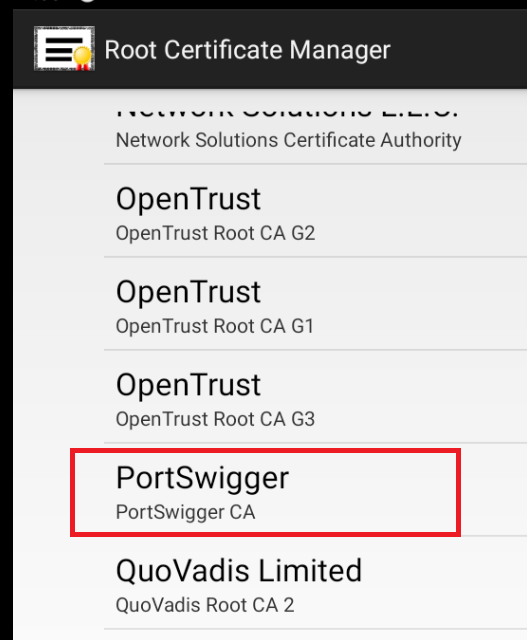
There is an alternative way to do this via ADB commands, but why bother when this is effectively drag and drop! This setup finally worked for me after several attempts and some trial and error.
Frida
For dynamic analysis, Frida is often used to hook into Android processes. With BlueStacks 5.x, you can push the Frida server to the emulator just like you would with a real device:
adb push frida-server /data/local/tmp/
adb shell "chmod 755 /data/local/tmp/frida-server"
adb shell "/data/local/tmp/frida-server &"
BlueStacks 4
With earlier versions like BlueStacks 4.x, the process involves using an external tool called BlueStacks Tweaker, which helps manage root access and SuperSU installation. It’s available at bstweaker.ru, and although built for BlueStacks 4, some of its features carry over to BlueStacks 5.
Conclusion
BlueStacks may not be the first tool that comes to mind for Android testing, but once configured, it can offer a clean and responsive environment that’s easy to setup and work with in general. With root access, certificate management, and Frida support all achievable with a bit of setup, it’s a solid option worth considering for your next test.